Skip to content
CreatePricing
The Last Shard's Aegis - AI-generated fantasy Hazard

The Last Shard's Aegis

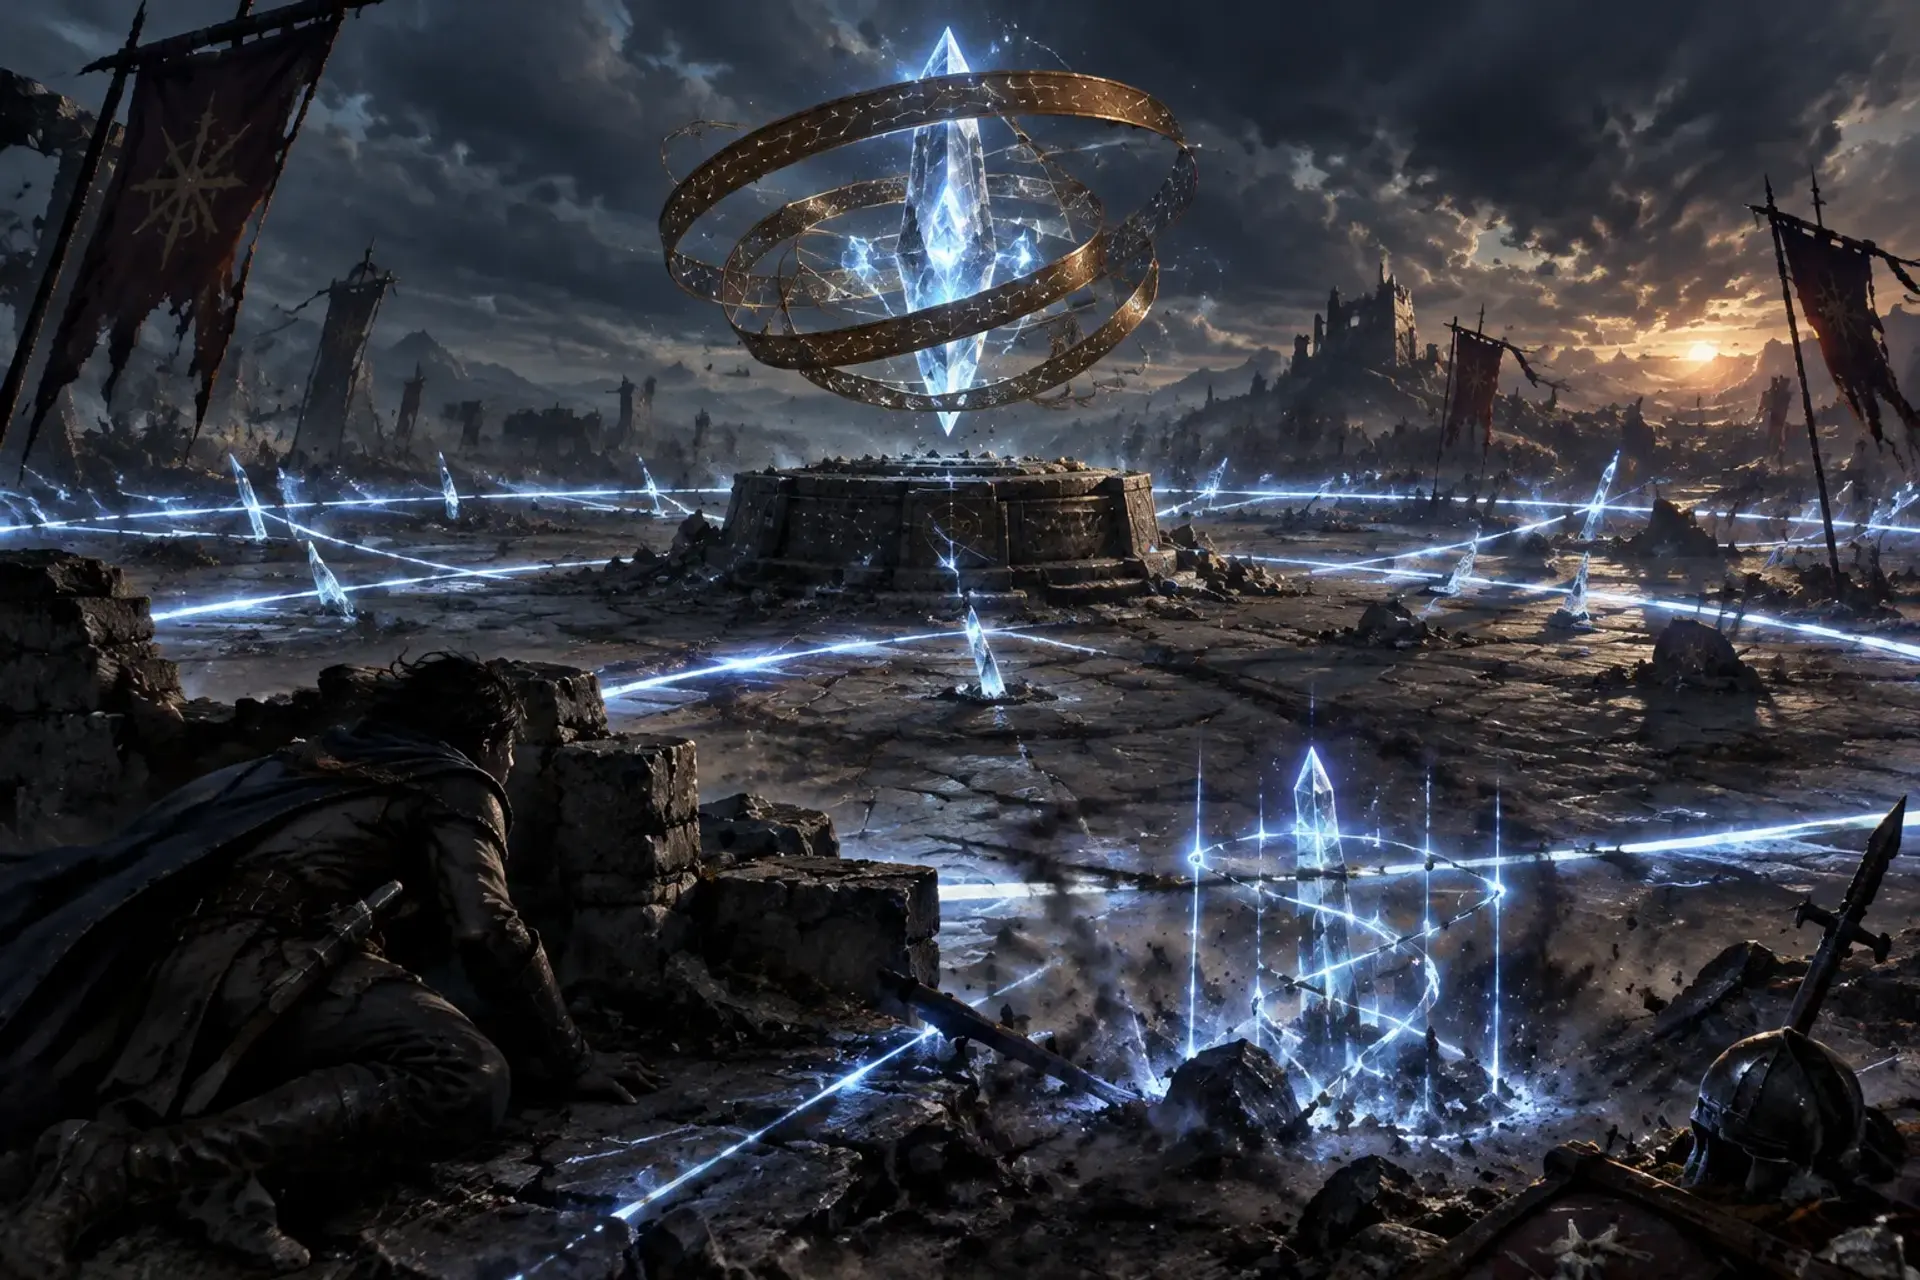
The Last Shard's Aegis is a battlefield ward built around a floating crystal shard. It turns the open ground around the dais into a shifting grid of force, punishing those who approach or attempt to carry the shard away. Its geometry is visible and its parts are reachable, giving combatants a chance to read and disrupt the pattern while fighting.

Complex · Magical · Level 10

The Last Shard's Aegis

The Last Shard's Aegis is a battlefield ward built around a floating crystal shard.
Spot
29
Disable
29
AC
29

At a glance

Level
10
Complex
Spot DC
29

Defences

AC
29
Fort
+21
Ref
+21
Will
+18
Hardness
18
HP
72
BT
36

Disable Three successes are required to disable the hazard

Initiative Stealth +20

The hazard

The Last Shard's Aegis is a battlefield ward built around a floating crystal shard. It turns the open ground around the dais into a shifting grid of force, punishing those who approach or attempt to carry the shard away. Its geometry is visible and its parts are reachable, giving combatants a chance to read and disrupt the pattern while fighting.

  • Magical
  • Complex
Stealth
(expert) to notice the ward's floor seams and active rings before it triggers
Trigger
A creature enters the 30-foot-radius area around the dais, or a creature attempts to take the shard while the hazard is inactive. The hazard rolls initiative when triggered.
Disable
Three successes are required to disable the hazard. A creature adjacent to a bronze ring can use Thievery or Arcana to disable that ring, or Athletics to wrench it out of alignment, at . A creature adjacent to the dais can use Arcana or Occultism to disrupt the central focus at . Each successful check disables one ring or the focus; a critical success counts as two successes. A critical failure on a check against a ring causes a shard lash, dealing force damage to the creature attempting the check. Disabling all three rings ends the hazard.
Initiative
Stealth +20, or Perception +21 if the ward is already visible
Routine
The ward has 2 actions each round. It uses Shardline Sweep once, then uses Lattice Snare against a different creature in the area if possible. It targets creatures within 30 feet of the dais that are not adjacent to a bronze ring. Each disabled or jammed ring reduces the ward's routine by 1 action, to a minimum of 0.
Reset
The hazard resets automatically at the start of each round while at least one ring remains active. If disabled, it does not reset. If all creatures leave the battlefield, the rings power down after 1 minute and reactivate when a creature approaches within 30 feet of the dais.

Damage

Immunities

critical hits, object immunities, precision damage

Resistances
  • physical 10, except adamantine
Weaknesses

adamantine 10

Effects

2
  • Shardline Sweep

    DC 29

    The creature must attempt a Reflex save. On a failure, it takes force damage and is pushed 10 feet away from the dais. On a critical failure, it takes double damage and is pushed 20 feet away. On a success, it takes half damage and is not pushed; on a critical success, it takes no damage.

  • Lattice Snare

    DC 29

    The creature must attempt a Reflex save. On a failure, it takes force damage and is immobilized until the end of its next turn as glowing bands pin it to the ground. On a critical failure, it also falls prone. On a success, it takes half damage and is not immobilized; on a critical success, it takes no damage.

Special rules

Visible Geometry.The hazard occupies a 30-foot-radius area centered on the dais. Its force effects require line of sight from an active bronze ring to the target. Solid cover blocks that line of sight.

The Prize Is Not the Ward.A creature adjacent to the dais can use Interact to take the shard. While carried by a creature, the shard is not itself a target of the hazard, but the ward continues its routine against other eligible creatures. If the carrier leaves the hazard's area, each active ring immediately makes a +22 force attack against the carrier, dealing force damage on a hit; after these attacks, the ward becomes inactive until the shard is returned to the dais or the rings are repaired.

Spotting it

Discovery

A creature that succeeds at a Perception check notices the floor seams and the way dust skitters away from the dais.

Perception

+21

Stop it

Signs of dangerFine dust moves in straight lines toward the dais, as if drawn by invisible threads. · Bronze rings emit a soft harmonic note that rises in pitch when a creature nears the shard. · Old scorch marks form three overlapping circles around the dais, with no damage on the stone at their center.

Countermeasures

In short

The shard's ward can be disrupted by tampering with the three bronze rings, suppressing the dais's magic, or physically shielding the shard from the rings' lines of sight.

Its story

What it looks like

A waist-high dais of black stone stands amid the battlefield's broken flagstones.

Why it is here

Keep the last shard secure while Azkhar's forces contest the battlefield around it.

Who made it

The ward was designed by Azkhar's former battlefield arcanists, then altered by Azkhar to recognize the shard as its protected prize.

Lore

The ward's original purpose was to keep a relic secure during a retreat, not to hold a battlefield.

Where it is found

A shattered battlefield centered on a ritual dais, with scattered rubble, broken weapons, and cover that can interrupt the ward's lines of sight.

Variants

In a ruined temple, replace the bronze rings with carved stone masks that project the force lines from their eyes.
If Azkhar has gained direct control of the ward, one ring can track a creature behind lesser cover, but destroying or disabling that ring also breaks Azkhar's link.
A damaged version has only two active rings. It has 1 action in its routine and can be disabled with two total successes.

Plot hooks

The shard is the last piece of a larger artifact, and the ward's pattern matches a map etched onto another fragment.
Azkhar's control of the hazard is imperfect. A character who studies its pulses may find a brief opening to seize the shard.
The ward was built by battlefield arcanists who believed they were protecting a civilian evacuation. Their names are engraved beneath the dais.

Media

0 images

No images yet.

Visual sheet

Turn The Last Shard's Aegis into a sheet

A high-res, share-ready sheet you can post or print.