
AI Image Workflow Generator: 20+ D&D Tools in Generate
Try CharGen's AI image workflow generator for D&D. Use guided tools for anime portraits, sketches, storyboards, character sets, maps, and more.
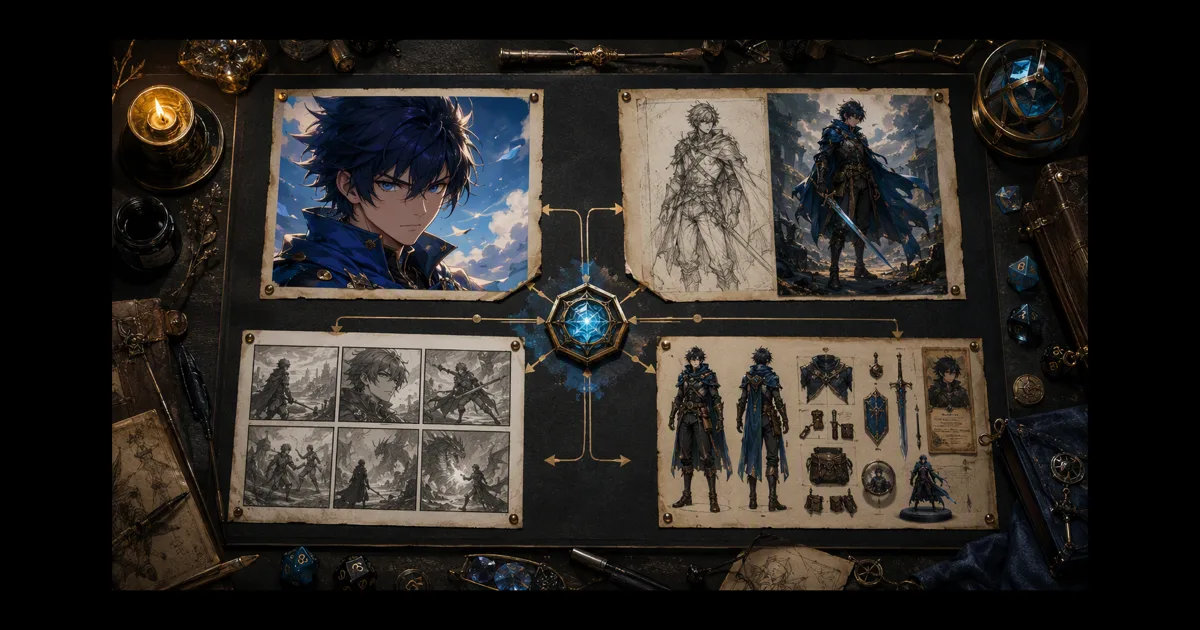
My D&D folder had a pencil map, three screenshots of a character, and a note that said “make this look like a storybook”. I opened three different tools to turn those pieces into something the group could use. The map needed one workflow. The character needed another. The note needed a third.
An AI image workflow generator should reduce that decision work. It should ask what you want to make, show the source it needs, keep the relevant settings together, and tell you the Gold total before you commit. It should also return a useful image instead of leaving you with a file that cannot move to the next step.
CharGen now puts more than 20 guided Workflows inside the Generate page. You can start with a saved image, an upload, a rough sketch, a written brief, or several Character References. The catalogue covers anime portraits, battlemap sketches, six-panel storyboards, character sets, sprites, heraldry, items, monsters, locations, colour treatments, and tabletop displays.
The important change is the unit of work. You choose an outcome rather than forcing every request through one large prompt form.
What an AI image workflow generator should handle
I do not need a new model picker for every small idea. I need the tool to understand the difference between changing a portrait into anime art, turning a sketch into a battlemap, and laying out a story in six panels.
| Part of the workflow | What it should answer | Why it matters at the table |
|---|---|---|
| Outcome | What will the result be? | I know if I am making a portrait, map, sheet, or scene |
| Source | Which image, sketch, brief, or saved character does it need? | I do not upload the wrong asset or forget a required reference |
| Treatment | What changes and what stays? | The result keeps the structure or identity that matters |
| Settings | Which quality, style, ratio, or output count applies? | I can choose a useful result without irrelevant controls |
| Cost | What will this exact request cost? | I can stop before Gold is spent |
| Handoff | What can I do with the result? | The image can move into Gallery, Edit, or another Workflow |
That structure also makes an honest limitation easier to see. A workflow can protect the main composition of a sketch. It cannot repair a drawing that does not show where the rooms connect. A Character Reference can keep a face and outfit closer between renders. It cannot make a poor pose worth keeping.
What changed on CharGen's Generate page
The 30 August changelog entry describes the new catalogue as more than 20 guided Workflows. Open Generate, select Workflows, and choose the result you need. Workflows now sit beside Create and Edit in Image Studio.
The catalogue groups entries by the job they do. You can search for a Workflow, open a category, or use New This Week. The main panel shows a selected Workflow and related outcomes. Each entry explains the required source, the settings that apply, the output structure, the quality choices, and the Gold total.
That last part is useful. A normal prompt box makes you remember which options control the request. A focused Workflow can show only the choices that affect its result. A six-panel Storyboard Sheet does not need the same controls as a colouring page. A Character Reference Views request does not need the same source rules as a Brand Mockup.
When generation finishes, the result is a normal CharGen image. It opens in the usual viewer. You can file it in Gallery, continue in Edit, or use it as the source for another compatible Workflow. That means the catalogue is not a set of isolated buttons. It is a set of short paths through the same image workspace.
The D&D workflows I would use first
The full catalogue is large, but most DMs can start with a small group. I choose based on the asset I have and the job due next.
| If I have... | I would open... | The output |
|---|---|---|
| A character portrait and a different visual treatment in mind | Anime Portrait or Pixel Art Character | A stylised character image |
| A rough drawing of a room, map, or creature | Sketch to Image or Sketch to Battlemap | Finished art that follows the main drawing |
| A scene idea and recurring characters | Storyboard Sheet | One connected sheet with six ordered panels |
| One full-body character image | Character Reference Views | Front, profile, and back views, plus a combined board |
| A saved character that needs another outfit | Character Variants | The same character with a changed visual detail |
| Two or three saved party members | Multi-Character Scene | A shared image with protected identity slots |
| One hero that needs table assets | RPG Character Asset Pack | Portrait, profile, token, standee, and miniature reference |
| A creature that needs several versions | Monster Variant Pack | Five related creature variants |
| A faction, magic item, or location that needs more art | Faction Heraldry Kit, Magic Item Showcase, or Location Variants | Matched views for a campaign asset |
The names are specific on purpose. They tell me what I am asking the system to protect. That is easier to judge than a general instruction such as “make more art for my campaign”.
How to use the Workflows tab
The flow is short. I still take a minute to decide what the source must prove before I generate.
1. Choose the result, not the model
Open Generate and select Workflows. Search the catalogue or pick a category. If an entry appears in New This Week, open it and read the source note before you add anything.
For example, choose Sketch to Image when the drawing already contains the shape and pose that matter. Choose Anime Portrait when you have an image and want a focused style treatment. Choose Storyboard Sheet when the order of events matters more than one finished frame.
2. Add the source that carries the important fact
The source can be a saved CharGen image, an uploaded PNG, JPEG, or WebP, a written brief, or a saved Character Reference. Some Workflows need one source. Others accept an optional source and several references.
Do not add an image because it looks attractive if it does not help the request. For a map, the rough plan is more important than a polished unrelated dungeon. For a character, the clearest face is more useful than a dramatic action shot with the face in shadow.
3. Set only the controls that affect the result
The panel shows the settings for that Workflow. Common controls include visual style, quality, aspect ratio, and output count. Storyboard Sheet uses a written brief and can add up to three Character References. Multi-Character Scene uses two or three saved references, where the order defines the protected identity slots.
For an output I need tonight, I choose Medium first. For a handout or a final campaign board, I may choose High. For a style test, Low is enough to decide if the treatment fits.
4. Read the Gold total
Low quality costs 4 Gold per output. Medium costs 10 Gold per output. High costs 30 Gold per output. If I request four results, the unit price is multiplied by four. The Workflows panel shows the total before generation.
That is a useful boundary. I can compare one Medium result with four Low results without guessing. I can also stop if the source needs more work. The total is part of the decision, not a surprise after the render.
5. Generate, inspect, and choose the next handoff
Each completed result returns as a normal CharGen image. Open it in Gallery if it is a keeper. Choose Edit if the composition is good but one detail needs correction. Use it as the source for a compatible Workflow when the next asset depends on it.
I do not treat the first result as final. The point of a focused Workflow is to make the next decision clearer. If the anime treatment works, I keep it. If the sketch preserved the wrong room, I fix the source and try again. If the storyboard loses the order of events, I rewrite the brief before I spend more Gold.
Turn a rough sketch into a D&D map
Sketch to Image is useful when I have a rough drawing that already shows the main pose, room, or composition. The Workflow keeps the drawing's main structure and framing while adding the selected render style. It does not ask me to redraw the idea as a detailed prompt.
Sketch to Battlemap applies that approach to a tactical map. The current description says that it keeps the main rooms, routes, doors, and boundaries. That is the right test. A battlemap can look attractive and still fail if a doorway moves or a route disappears.
I would start with a simple pencil plan for a ruined watchtower. I would mark the entrance, spiral stair, collapsed wall, roof access, and two cover positions. Then I would choose the Workflow and check the result against those marks. If the map adds a balcony, that is fine if the original route still exists. If it moves the stair to the wrong side, I would not use it for play.
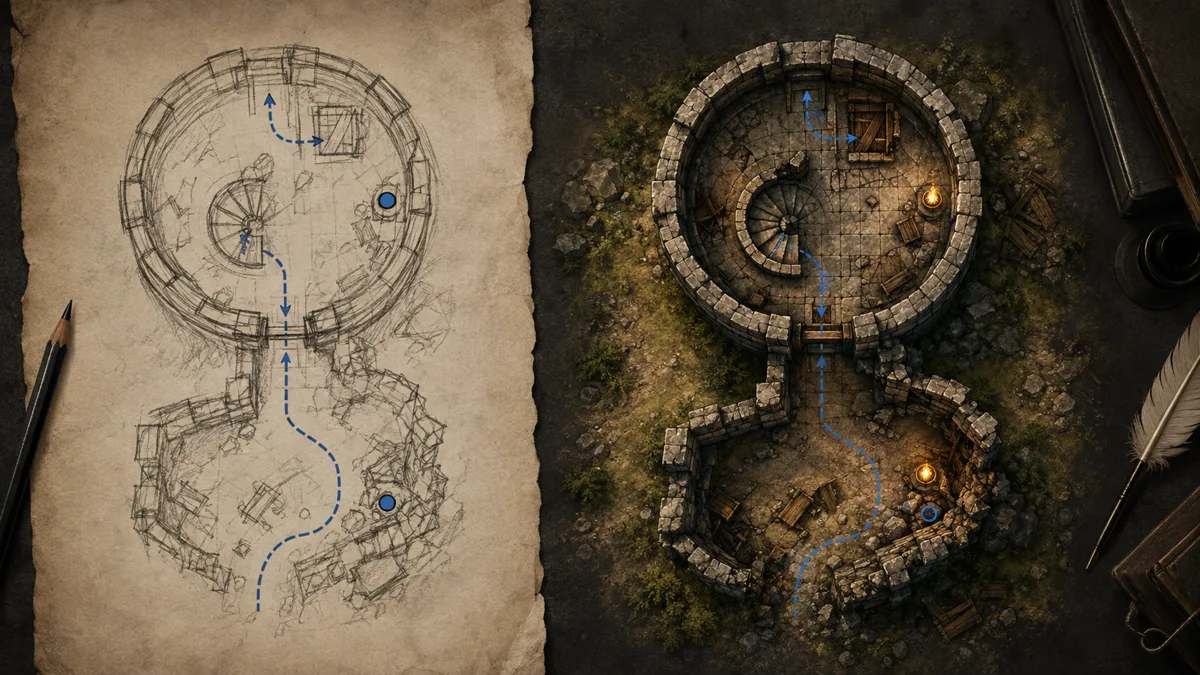
For a player-facing map, I remove private notes before upload. The D&D Beyond Basic Rules remain my rules reference. The Workflow can draw a room. It does not decide how cover, movement, traps, or line of sight work in my game.
Build several character assets from one source
The character workflows solve a different problem. They start from an identity that I want to keep while changing the view, outfit, format, or setting.
Character Reference Views takes one full-body character image and creates separate front, profile, and back views. It also creates a combined reference board after the views finish. Those are three generated views, not one image pretending to contain three angles. The board is a useful review and download asset.
Character Variants changes a selected detail such as armour, outfit, hairstyle, visible age, or seasonal makeup while keeping the rest of the character stable. I use it when a character needs a winter cloak or ceremonial armour, but I do not want a new face.
RPG Character Asset Pack creates five separate images in one request: a portrait, profile, virtual tabletop token, standee, and miniature reference. This is useful when a new player character needs a coherent set before session one. It also reduces the chance that I invent five different versions of the same hero by writing five unrelated prompts.
The current changelog lists the specific pack prices as 20, 50, or 150 Gold for Low, Medium, or High quality. Character Reference Views costs 12, 30, or 90 Gold for the three generated views. The combined board is included after those views complete. The form shows the total before I start.
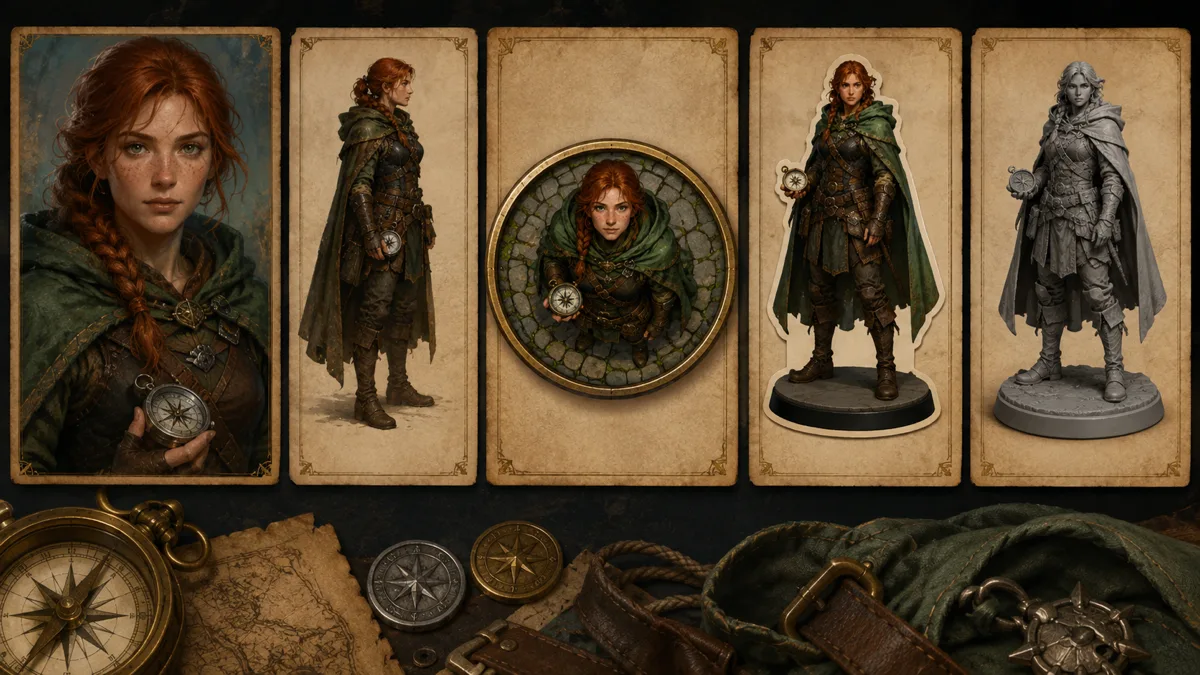
For a campaign with recurring characters, I use the saved Character Reference workflow as the identity store. A generated asset pack is a set of outputs. A saved reference is the reusable identity context I add to future image and video prompts. They work together, but they are not the same object.
Make a six-panel storyboard from a scene brief
Storyboard Sheet is the best fit when the group needs to see a sequence rather than one finished illustration. It starts with a written brief. It can also use an image and up to three Character References to carry people, settings, and composition across six connected panels.
I would use it for a scene called The Door Under the Lake:
- The party finds a bell tower under the water.
- The wizard lights the drowned stair.
- The rogue finds a dry mark behind the bell.
- The guardian wakes.
- The party chooses the lower tunnel.
- The door opens on a second moon.
That list gives the Workflow a sequence. It does not prescribe every camera move. The Storyboard Sheet guide shows the focused version of this job, while Session Prep is the better place to decide what the scene should accomplish in play.
The result is a connected sheet, not six unrelated images. I check the same character's hair, armour, and position. I check that the sixth panel follows from the fifth. I also check whether the reveal should be visible to players or stay in the DM's notes.
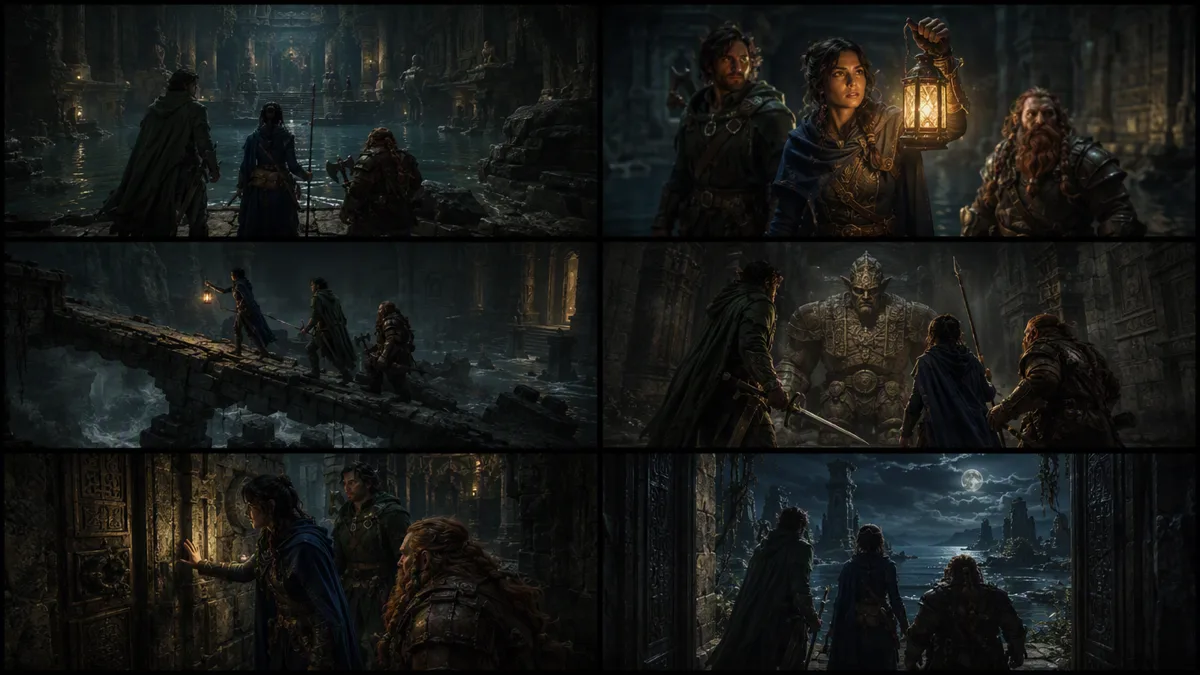
For a quick visual pitch, I use one clear sentence per beat. For a campaign record, I add the character names, the location, and the decision that changes the scene. The Workflow can organise the frames. I still choose what counts as canon.
Chain Workflows without losing the source
The most useful part of the catalogue is the handoff between results. I can move from a broad idea to a small set of connected assets.
| Starting point | Next Workflow | Result |
|---|---|---|
| Full-body character image | Character Reference Views | Three angles and a combined board |
| Saved Character Reference | Character in Scene | The same hero placed in a new setting |
| Rough room plan | Sketch to Battlemap | A tactical map that follows the plan |
| Finished location image | Location Variants | The same place in new weather, time, or condition |
| Written scene brief | Storyboard Sheet | Six ordered panels |
| Character portrait | RPG Character Asset Pack | Five separate tabletop-ready assets |
| Faction symbol or crest | Faction Heraldry Kit | Six matched heraldry assets |
I keep the source and result names clear. Saltmarsh watchtower sketch is better than final-map-v4. A saved result should tell me what it is and which Workflow made it. That makes the next handoff easier when I return to the campaign a month later.
The same rule applies to chained style changes. I would not pass a low-quality style test into a final token pack if the face is already soft. I would keep the clean original, choose the treatment again, and use the stronger result as the source.
More than characters and maps
The catalogue also covers campaign assets that used to need separate prompts. Faction Heraldry Kit creates a crest, banner, shield, tabard, wax seal, and colour set. Magic Item Showcase keeps one item stable while placing it in a hero relic view, detail study, altar display, or practical scene. Monster Variant Pack creates five creature variants while keeping the species and defining anatomy stable.
For a location, Location Variants can show the same place at a new time, in new weather, or in a changed state without moving the camera. Sequence Sheet can show a spell, combat move, item activation, or product use across six ordered frames.
The practical outputs are not all fantasy scenes. Pixel Art Character creates a compact sprite treatment. Colouring Page turns a character, creature, or scene into black line art on white. Product Photography, Brand Mockup, and Miniature and Terrain Showcase suit creators who need to present physical tabletop work.
The older Workflow set is still available. It includes Anime Portrait, Sketch to Image, Storyboard Sheet, Plushie, 3D Cartoon Diorama, Box Model, Tarot Card, Claymation, Art Style Transfer, Storybook Animation, and Fantasy Bestiary Page.
You do not need to learn all of them. Pick the output that solves the next problem in your campaign folder.
Where the workflow still needs my judgement
Guided controls reduce setup. They do not remove review.
Start with the source. If the source image contains a hidden player note, crop it or use a clean version. If the sketch has no clear route, label the route before you ask for a battlemap. If a party image has two characters facing away, add a better identity image before you expect a reliable reference result.
Check what the Workflow promises to preserve. Sketch to Image protects structure and composition. It does not promise to preserve every rough line. Character Variants protects the character while changing a selected treatment. It does not make an accidental new weapon part of the campaign record.
Read the output count. Four Low results cost 16 Gold. One High result costs 30 Gold. The cheaper choice depends on the decision you are making. I use several Low results for style selection. I use one High result when the source and treatment are already clear.
Do not confuse a visual result with a rules result. A token does not calculate a creature's reach. A map does not resolve difficult terrain. A character portrait does not confirm a class feature. Keep rules and campaign facts in their own source records.
Finally, ask if the result is safe to share. Use your own artwork or images you have permission to process. Check player consent before you publish a face, voice, or private campaign scene. A guided Workflow makes an image request easier. It does not change who owns the source.
FAQ
What is an AI image workflow generator?
An AI image workflow generator gives you a focused outcome, a source picker, the settings that apply to that outcome, an output plan, and the total cost before generation. CharGen's Workflows tab covers characters, maps, storyboards, game assets, styles, and tabletop displays.
What D&D image workflows does CharGen support?
CharGen supports Anime Portrait, Sketch to Image, Storyboard Sheet, Character Reference Views, Character Variants, Multi-Character Scene, RPG Character Asset Pack, RPG Sprite Sheet, Sketch to Battlemap, Location Variants, Sequence Sheet, heraldry, item, monster, miniature, colouring page, and other focused Workflows.
Can I turn a sketch into D&D art?
Yes. Sketch to Image keeps the main structure and composition of an uploaded drawing while adding the chosen render style. Sketch to Battlemap applies the same approach to rooms, routes, doors, and map boundaries.
How much do CharGen image workflows cost?
Low quality costs 4 Gold per output, Medium costs 10 Gold, and High costs 30 Gold. The total changes with the output count and appears before you generate. Some multi-output Workflows show their own total for the complete set.
Can I reuse a workflow result?
Yes. Each result returns as a normal CharGen image. Open it in Gallery, continue in Edit, or use it as the source for a compatible Workflow. For recurring characters, add a good result to a saved Character Reference when it shows a useful new angle.
My normal starting point is simple. I open Workflows, choose the outcome, add the clearest source, select Medium, and read the total. If the result solves the problem, I keep it. If it does not, I fix the source before I add more settings.